
Hello again Envirosaurus Rex friends! Today I have a super cute, super fun and SUPER environmentally friendly project for you to try. I made these little Frankenstein Penguin Toys for the growing population of children in my family. They were all very well received and the kids still love them!
I was inspired by an old bathrobe I own that had a cute penguin pattern, but you could make any Frankenstein toy shape you like with the materials you have! The idea is to give your old items a new purpose. As these are toys they would also work well with old jumpers or soft fabric clothes.
You will need:
- An old bathrobe, or whatever fabric will make up the body of your toy. Make sure it is clean and dry before starting.
- Felt, for the body accents.
- Safe stuffing, also keep your fabric scraps to add as stuffing.
- Safety eyes, stick on googley eyes or pom poms, whatever you need for your toy’s eyes.
- A sewing machine.
- Thread, appropriate for your fabric’s weight.
- A machine needle, appropriate for your fabric’s weight.
- A printed image of your toy shape.
- Cardboard, to create your template (if making more than one toy).
Let’s get started!
Step 1: Create your template
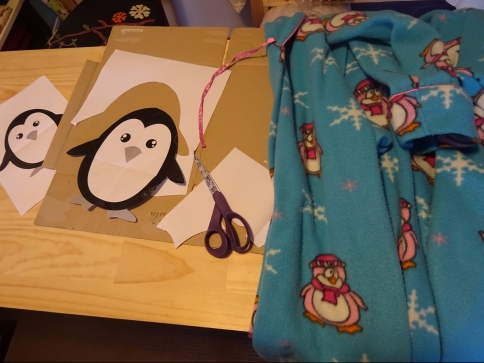
Cut out your printed paper toy template and glue it onto your cardboard. Then cut around the toy outline on the cardboard. You will now have your re-usable template. I used two different sized toy templates.
Step 2: Cut your fabric.


Trace the outline of your template onto your fabric. Try to cover as much space as you can to get the most out of your old item. Alternatively, if you are making just one toy, make sure you place the template over a feature or cute design in your old item, as you can see I made sure to include the snow flake and a part of the penguin design.
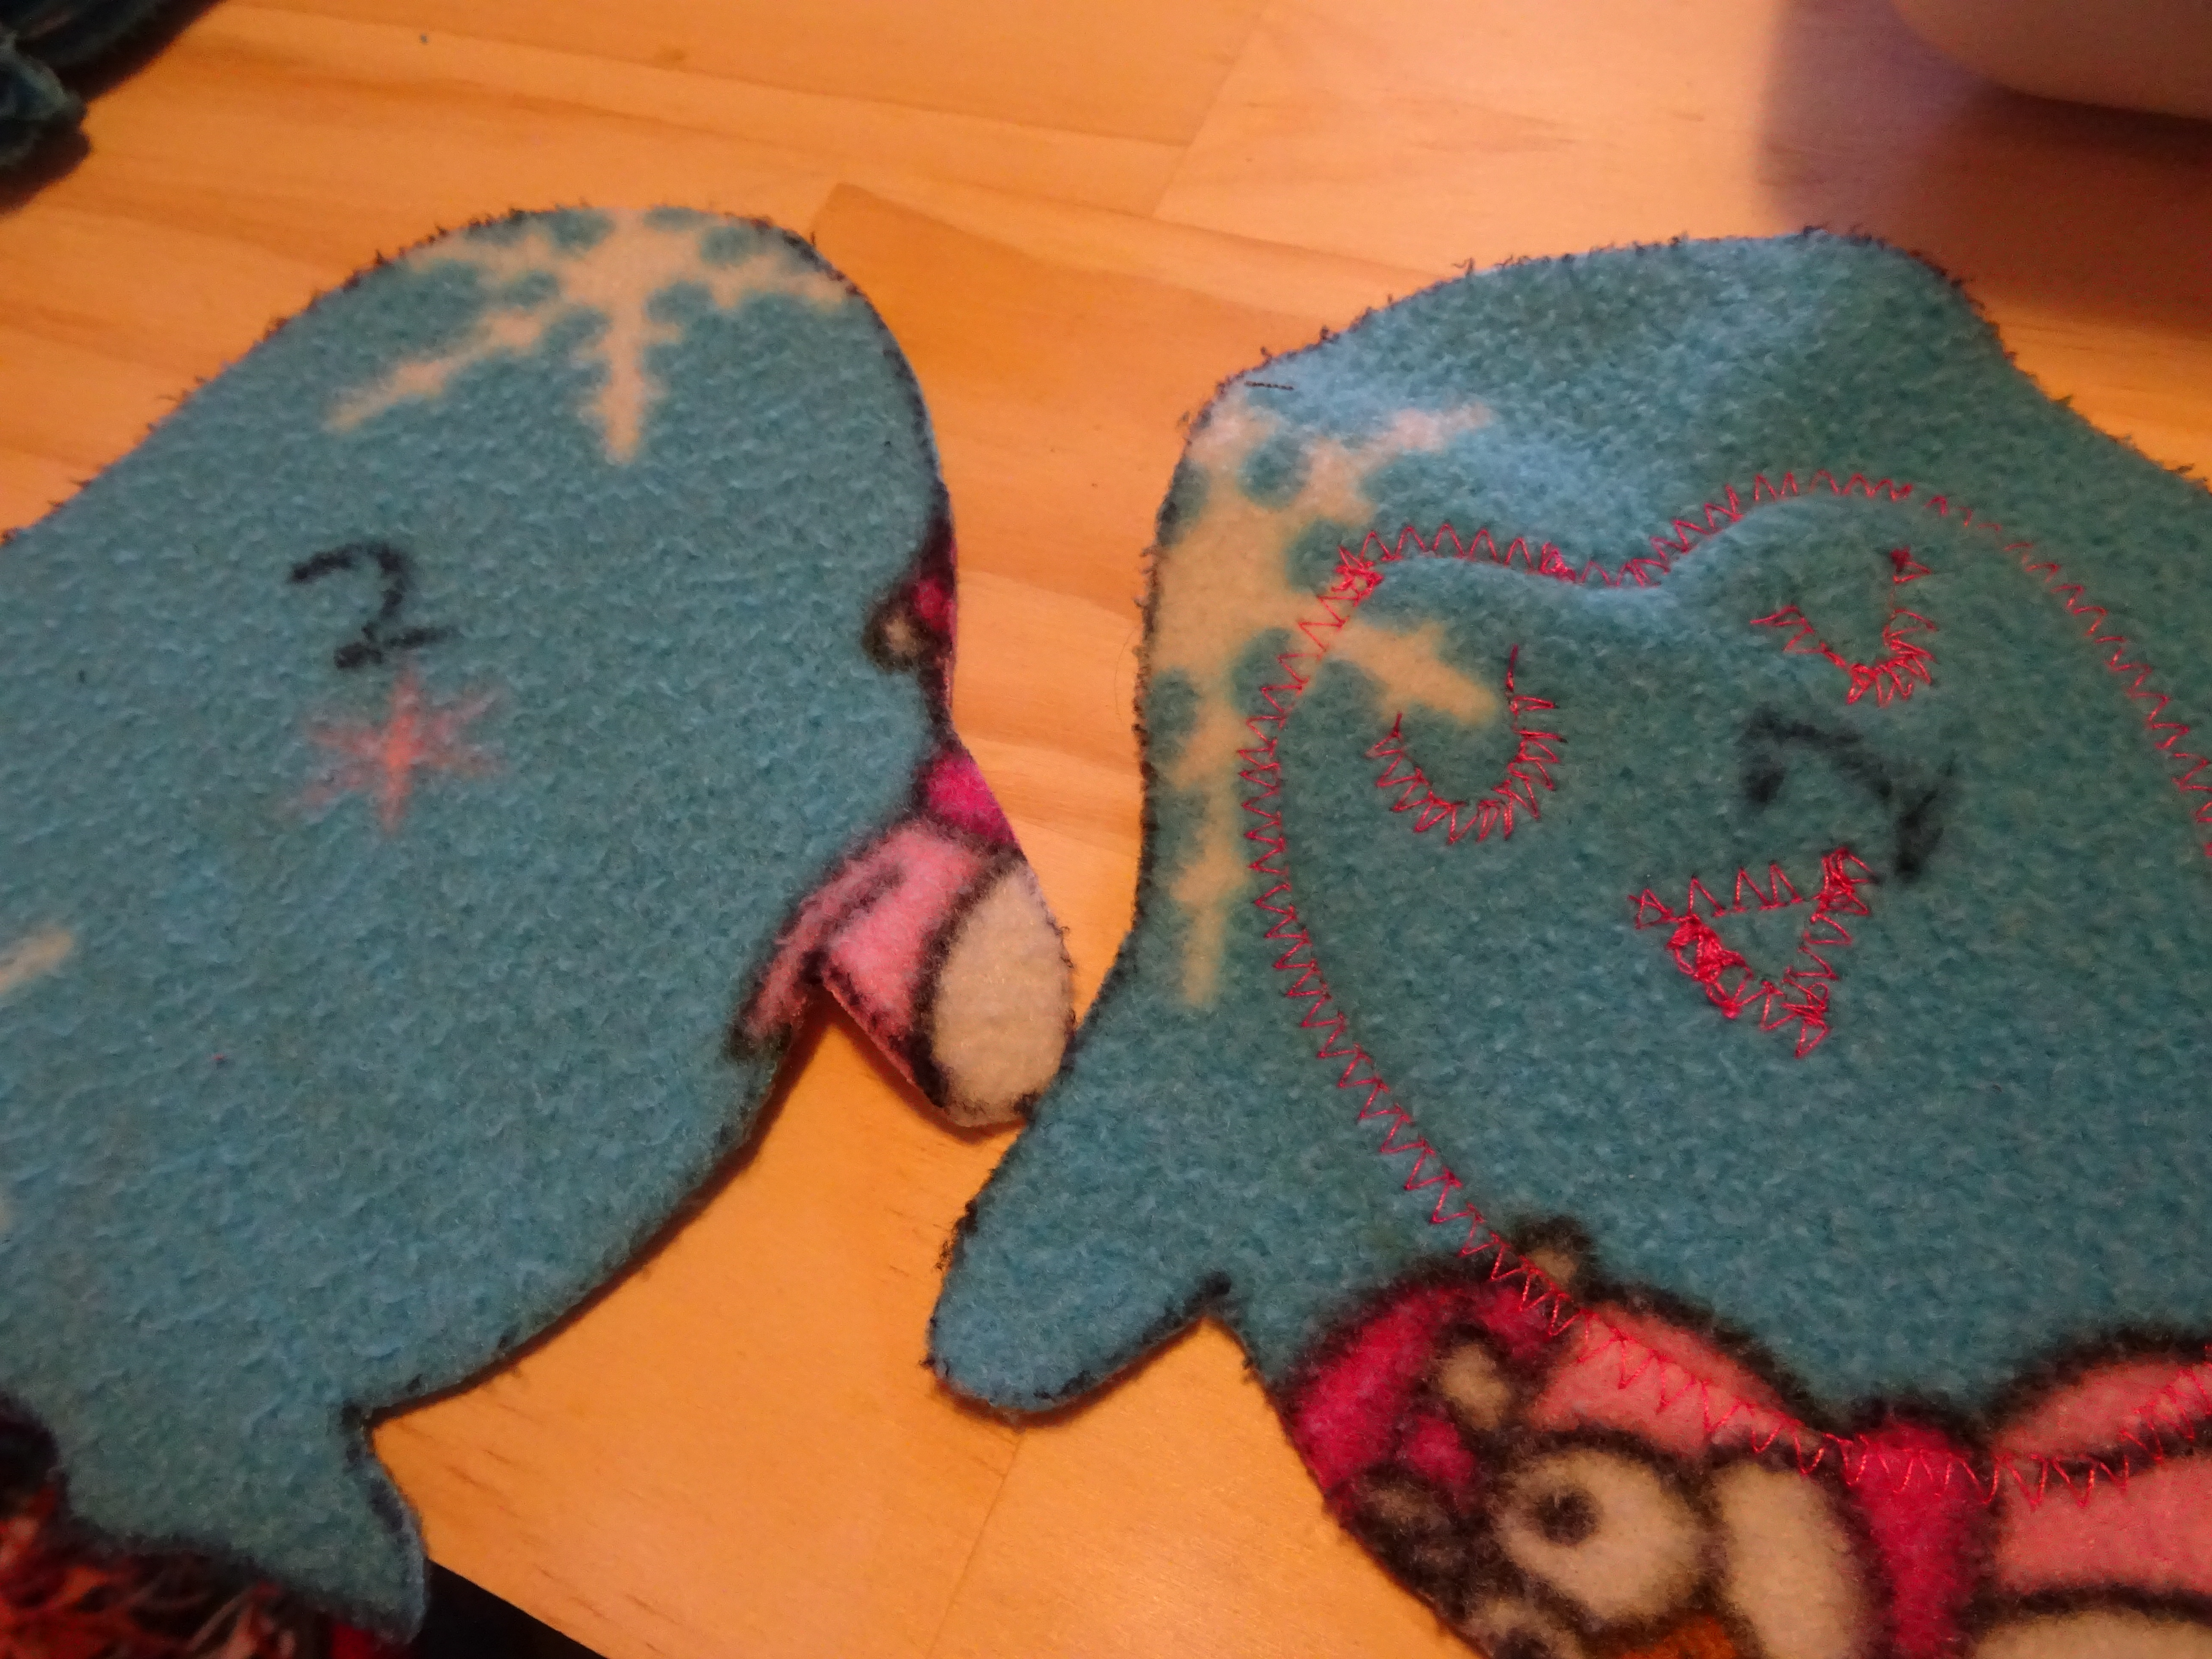
As my template penguin was slightly asymmetrical, I needed a front and back side for my toys to ensure the fins aligned on my finished toy. I numbered my sides 1 for front and 2 for back. All the front sides used the template face up, and all the back sides were the outline of the template facing down to the fabric, as below.


Step 3: Add your accents.


If you want to keep the same look as your template, use baking or tracing paper to trace any defining features or accents. In this case, I wanted to define the body of my penguin using felt, so traced the inside of the template. I then used this to cut the correct shape from my felt.
Now is your chance to get creative! I cut some triangle beaks and eyelashes, from contrasting felt, then used a bright pink thread and sewing machine to zig-zag stitch the accents onto the good side of my front pieces. If you need to sew the eyes on, or any other details, now is the time to do it so you can easily sew and the threads are protected inside the finished toy, as below.
Step 4: Sew your toy together!


Now is your chance to become Victor Frankenstein himself and create your upcycled creature!
Put your front and back sides together, wrong side out or good sides facing together. Your threads should be facing out, while your accents and features are facing in. Pin your pieces together then sew a close, straight seam around your outline.
IMPORTANT! Make sure to use the correct yarn and needle for your fabric weight. I found this out the hard way, and trust me, it is not worth the pain and frustration!
Once you have almost joined your pieces, stop and allow yourself a large enough gap to turn the whole toy inside out, as below.


Then carefully turn your toy inside out and use a ruler or blunt, pointy tool to smooth the edges from inside the toy.
Step 5: Stuff it!
Now, start stuffing your toy. You will need to try to stuff as far away from your open edge as possible to allow you to close the open edge later with the sewing machine. I used a mix of Soft Fill Stuffing Premium from Lincraft, and fabric scraps in the spirit of upcycling!
Once your toy is as full as you want it to be, use your machine to close the remaining edge. I used a zipper foot to get the closest, least visible seam.
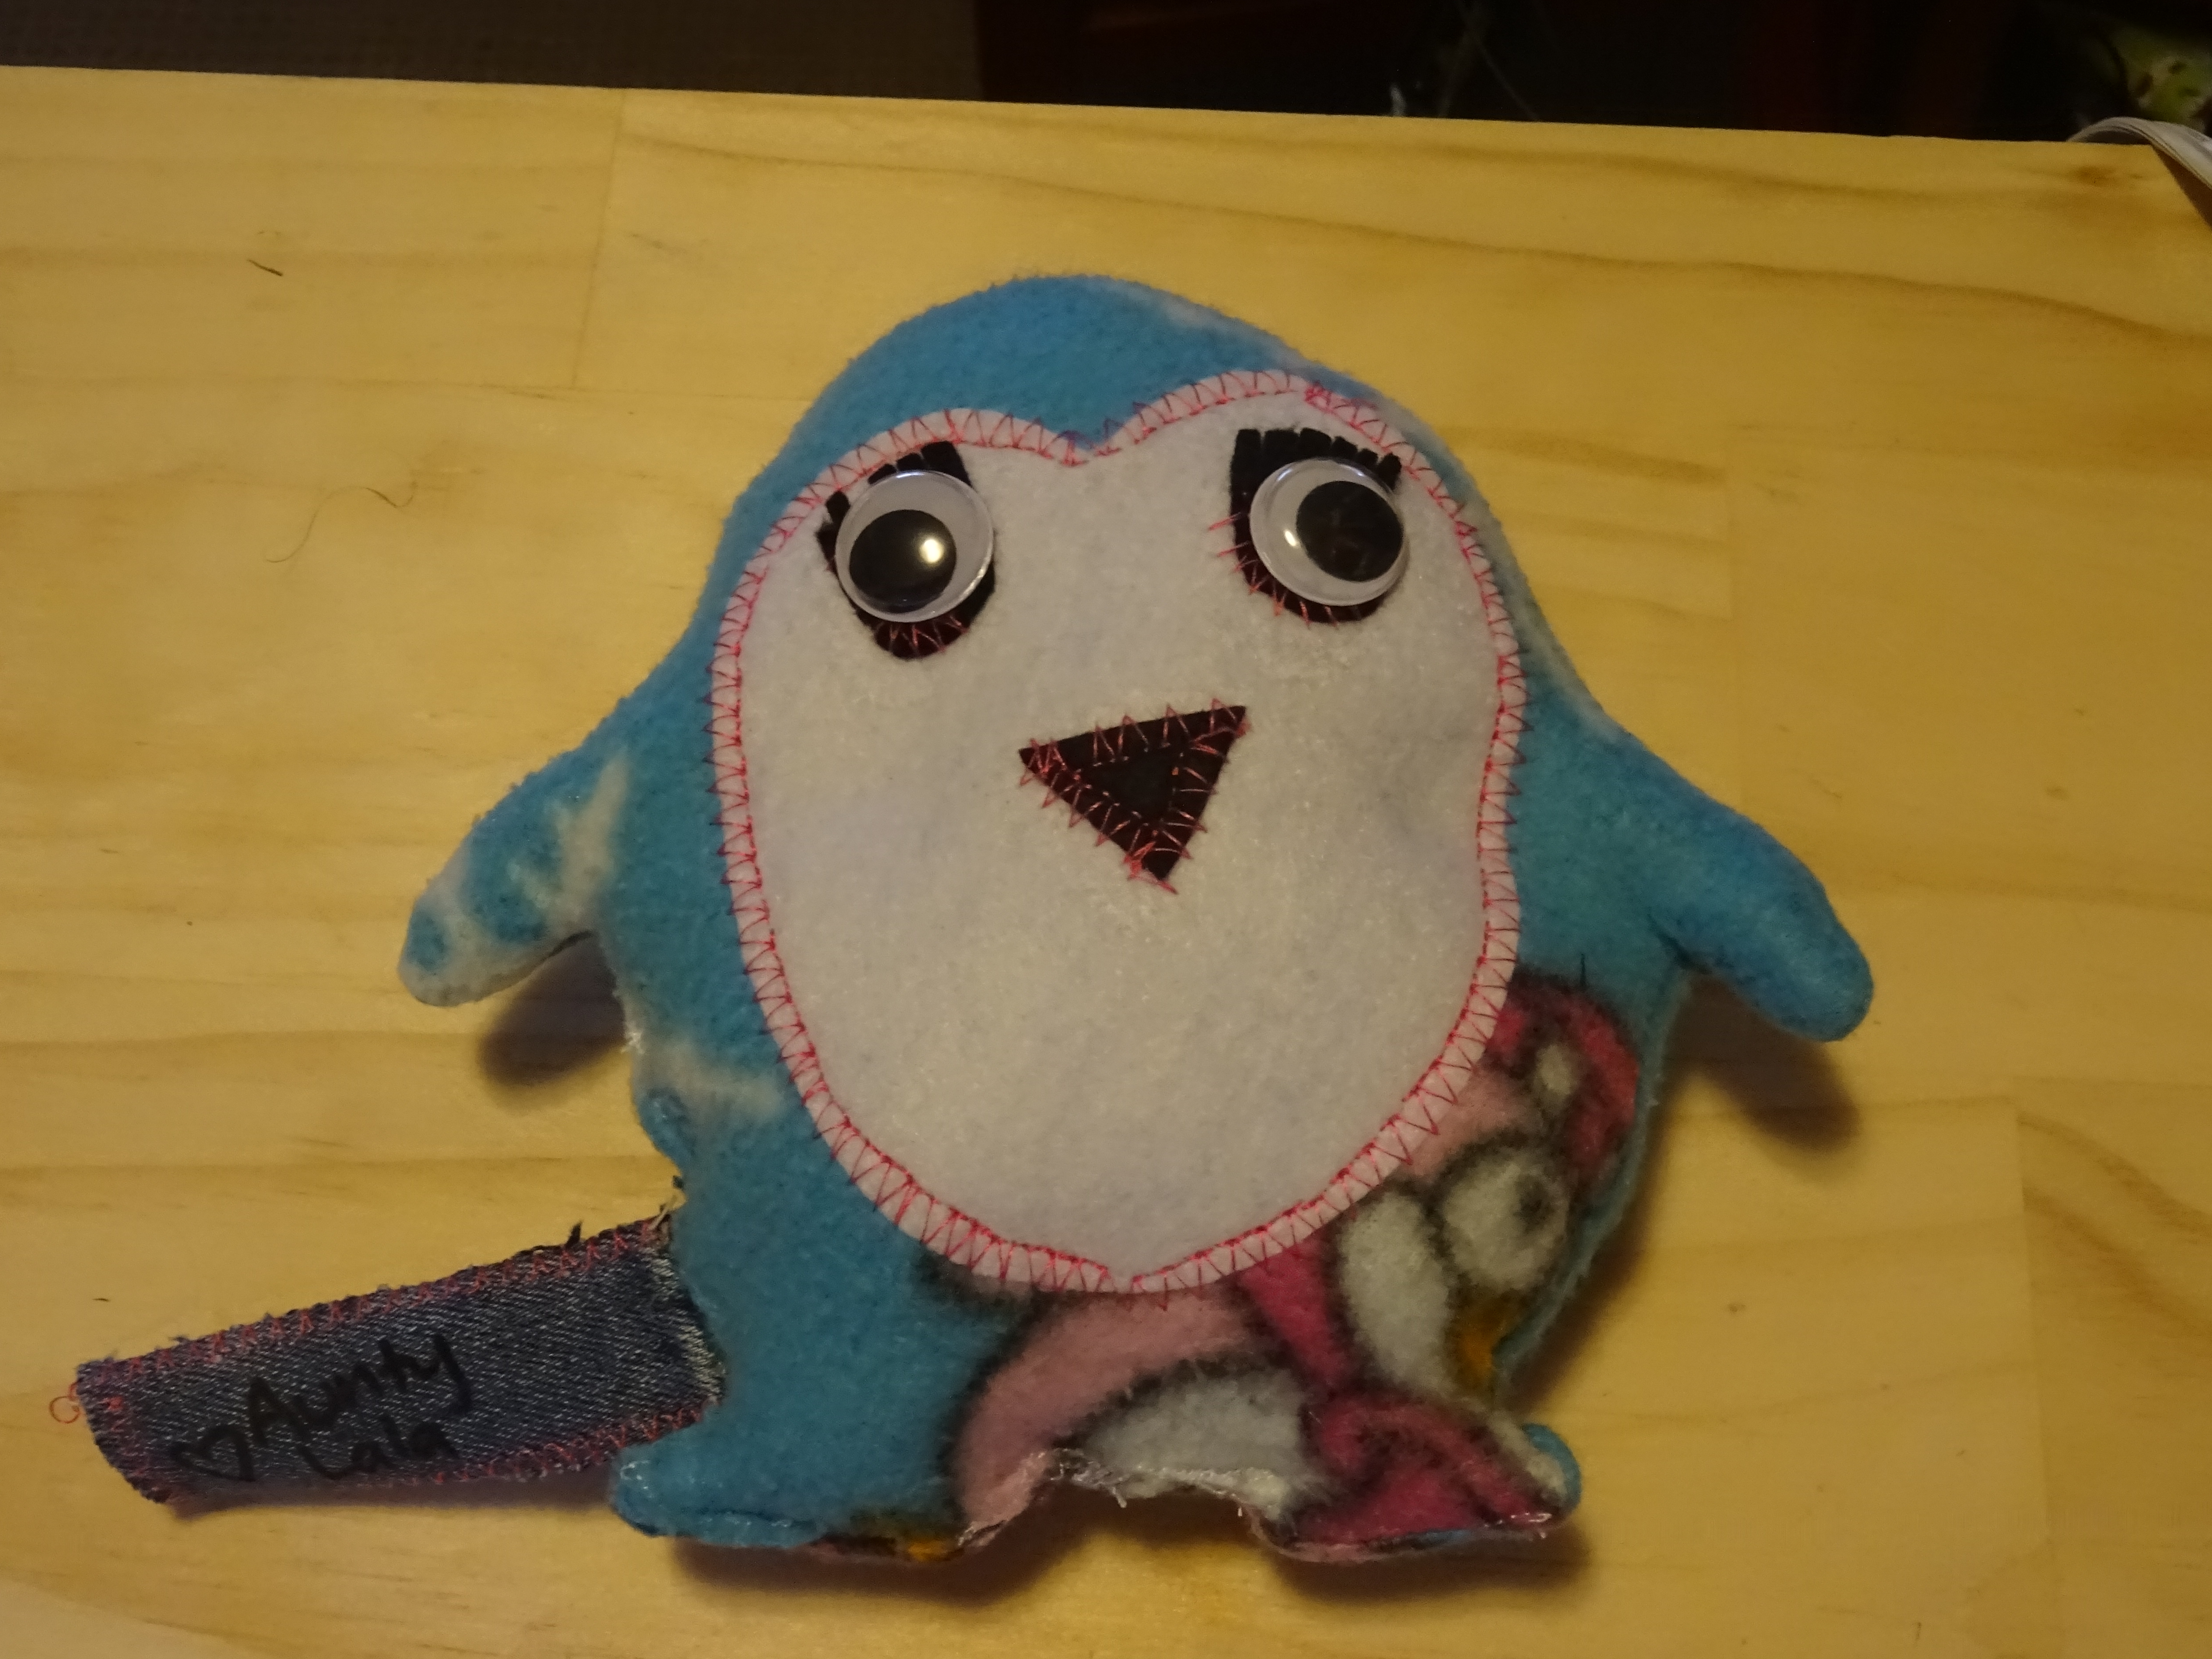
And you’re done! Yay! Now you have a cute toy for the expanding children in your life (or for yourself!) and the best part is you can let your imagination run wild while saving the planet!
Enjoy, and please share any comments below. I would love to see your Frankenstein Toys too!
